
Project laid out (almost) chronologically. If you're interested in looking at it categorically, check out this page
Here is an outline of my now concluded thesis project where I've been exploring the technical aspects of the typographical stack for publication design. + Investigating different ways of producing publications by writing programs.
not exactly a summary, I just wanted to put a note here and say I did this whole project with almost no dependencies (the only two being p5.js and later pdfkit.js) and no LLM's. All of this is handcrafted in vanilla js :)
published February 18th 2026
This section is the process part. What I was thinking about at each stage and how they waterfalled into the next exploration of the project. If you're interested in what I made using these tools feel free to skip to Part 2
Or rather the vocabulary that gets implemented when developing publication design tools.
Software for printed artifacts. Rebuilding the production of books from first principles. Your project lives right at the intersection of procedure and tactility. When people ask you why, you don’t need to answer them. But if you must, your answer is dead on: that with a new tool comes new affordances which in turn creates new forms. ~Ali
This project started around March of 2025. Although I would say I'd been experimenting with some of these concepts since the winter of 2023 at OCAD U specifically Anthony Campea's TYPE 3 (2023). For which I made this p5 based typesetting tool that gave words weight depending on their word length.

Words weight depending on their word length
Anyways. The project really started in its current form in March 2025 when I was doing an Independent Study with Roderick. I started off with writing an implementation for basic typesetting, with the idea that later I can intervene in this process and use it in interesting ways (akin to the example above).
(+) linked text boxes so words that overflow from one can go into the next.
First implementation of linked text boxes.
Eventually I also added hyphenation (can see below marked by red text), a simple column based grid and the ability to collect spreads together into a 'Book'.

At this point I was also heavily using Javascript classes to model all of this elements. I later revised them to be pure functions, which I will talk about later.
Another thing that isn't visible in the screen grabs is the management of DPI and Units. Essentially, to make publications you want to use typographic units, such as ems, picas, points and inches. And these units also need to correspond to the paper sizing. However, I was doing all of this in p5, which meant everything was raster an specified in pixels, and it didn't print great unless you upscaled it to about 300DPI which wouldn't fit on the screen and be really expensive and slow to draw.
Anyways, to circumvent all of this, I thought I should have a Scale object, which would have helper functions that would provide pixel values for any given DPI. Given that all elements use this Scale for positioning and sizing, everything would stay in proportion. Then it can be designed at a lower DPI and exported at a higher one.
Implemented basic text formatting and layout. Then added a grid system to locate and position the items onto a page. Created a data structure/interface to save data and express these elements and finally a Scale that manages sizing for different DPIs. I was almost done. The only thing left to figure out was imposition.
How do I turn 2D surfaces ~> Spreads into printable sheets that can be bound as a booklet.

This took some time to figure out.
I had to simulate this process by moving pieces of paper around or drawing and making arrows to slowly understand what the pattern was. Once I did that a few times I was able to write some helper functions that given an array of page numbers:
let pages = [
    [0, 1],
    [2, 3],
    [4, 5],
    [6, 7],
    [8, 9],
    [10,11],
    [12, 0]
]
Would return imposed pages like this
let imposed = imposePages(pages)
/* imposed = [
    [12, 1],
    [2, 11],
    [4,  9],
    [6,  7],
    [8,  5],
    [10, 3]]
*/
I had a lot of fun figuring this imposition stuff out. Because it was a very tactile experience with programming and algorithms. And how these numbers come together on paper to form that booklet is just so satisfying, and being able to undestand it through numbers in such an abstract sense is quite fun!

With imposition figured out, I had all the first principles that are (probably) necessary for a publication software down.
It was time to intervene!
Naturally, since I had just spent so much time trying to figure out imposition, that's where I ended up intervening. So the first idea I had was, to take sheets and offset them by some amount vertically.
This is the finaly booklet that I submitted for my ISP and its interface counterpart.
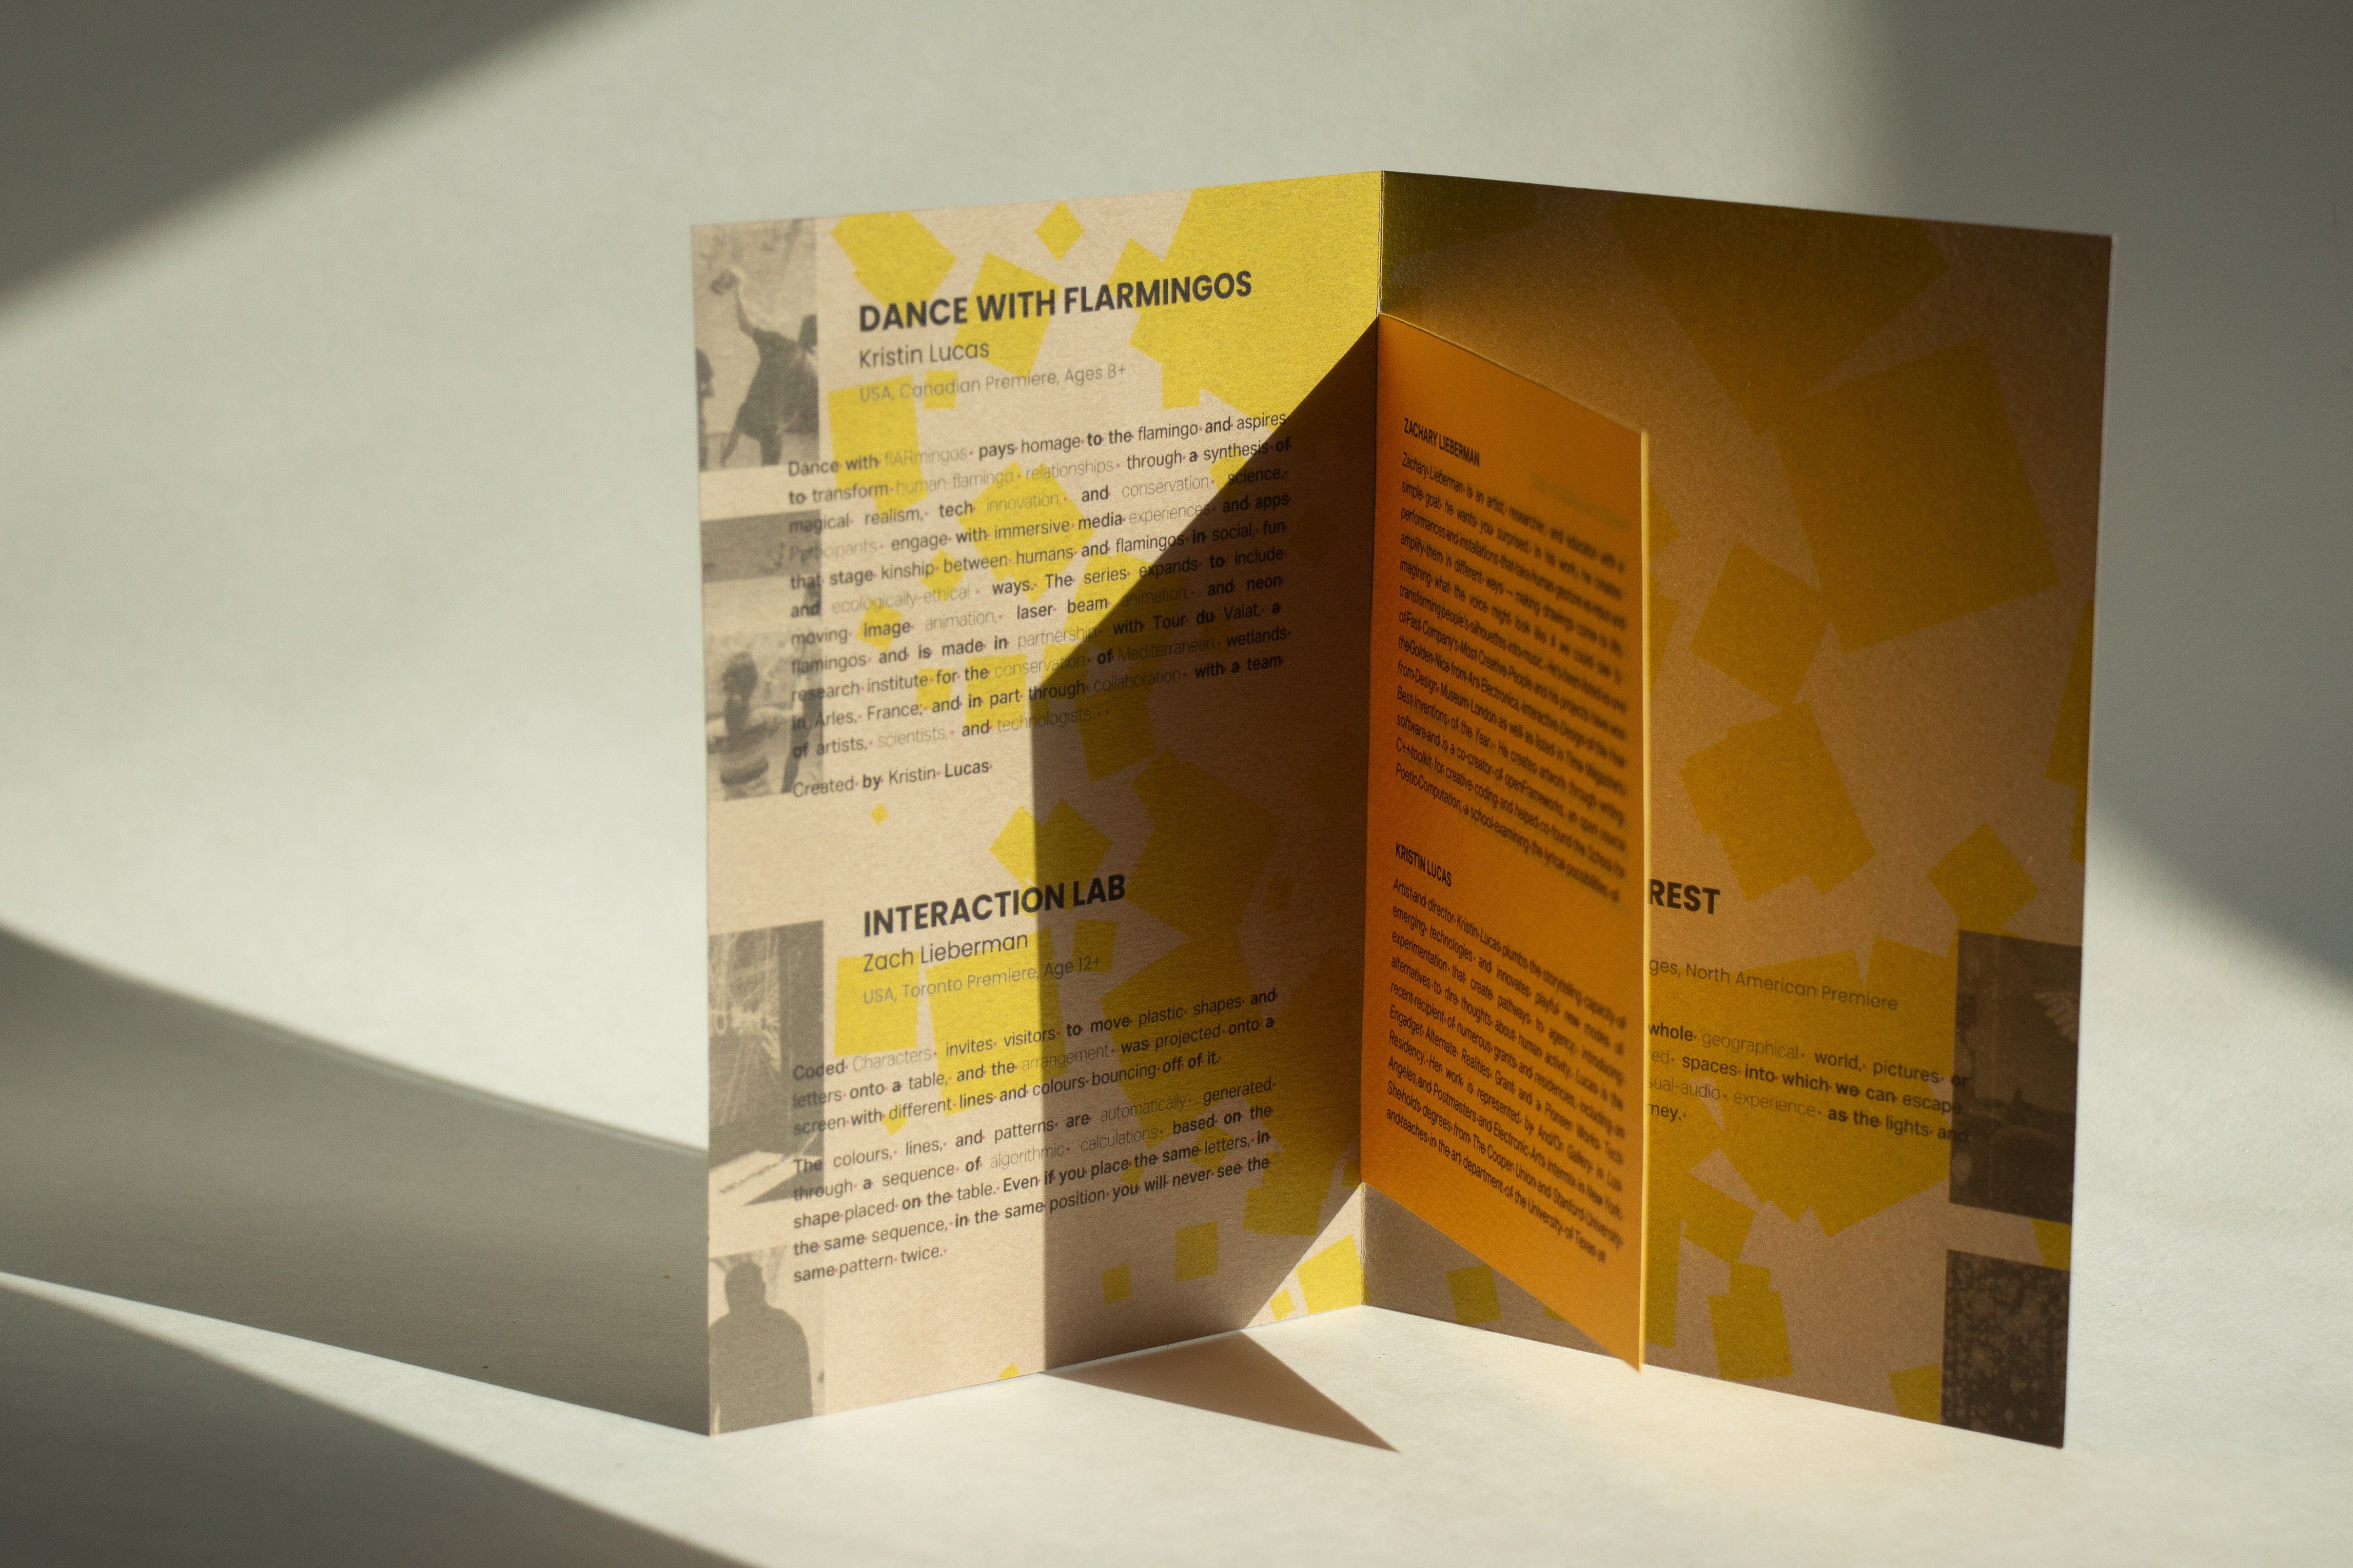
Over the summer I had the chance to work on a menu design for a restaurant. So I took this opportunity to explore what horizontal offsets would look like (in terms of implementation).
The horizontal offsets were a little harder to implement. Because offsetting a sheet will change the dimensions of the spreads that fall on the sheets. So managing that was a hassle. But eventually I was able to figure it out [0] .
Overall I also didn't have as much trouble as I thought with sizing and printing upscaled raster type. And somehow everything worked out pretty well.
The production was much more intensive though. Since unlike trimming regular publications -- where you can trim all the pages together after theyre bound -- with this menu I had to trim them all before binding and correctly bind them together with the offsets.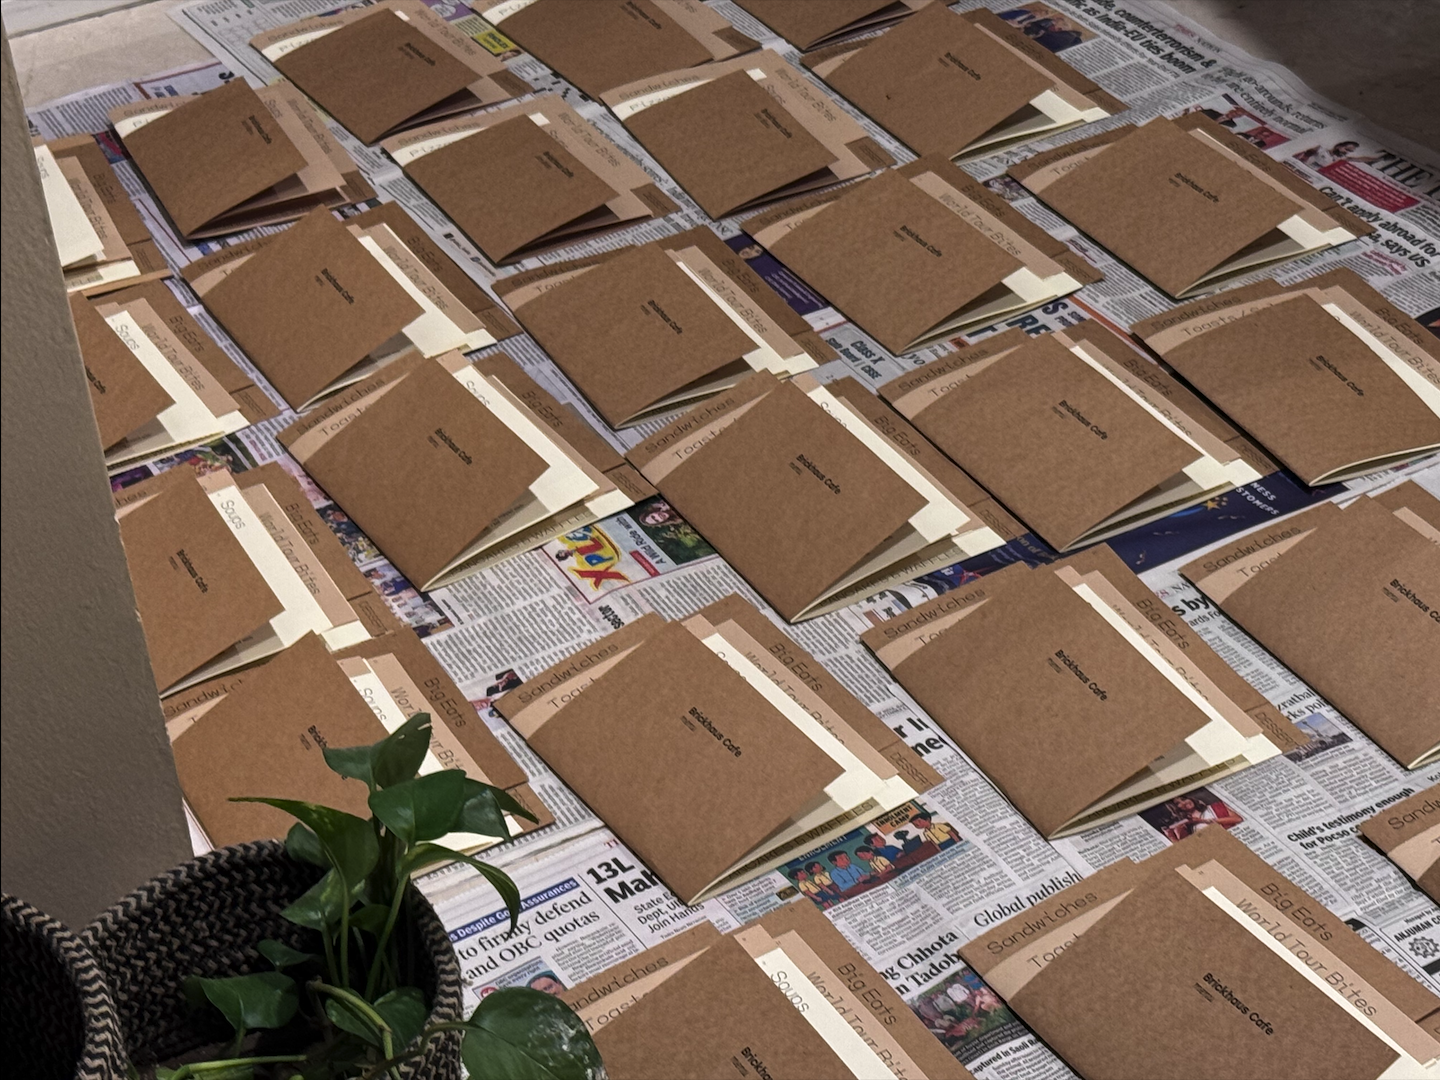
[ 📹 ] My younger brother took this video. dumb shit.
This is how the final thing came out to be:
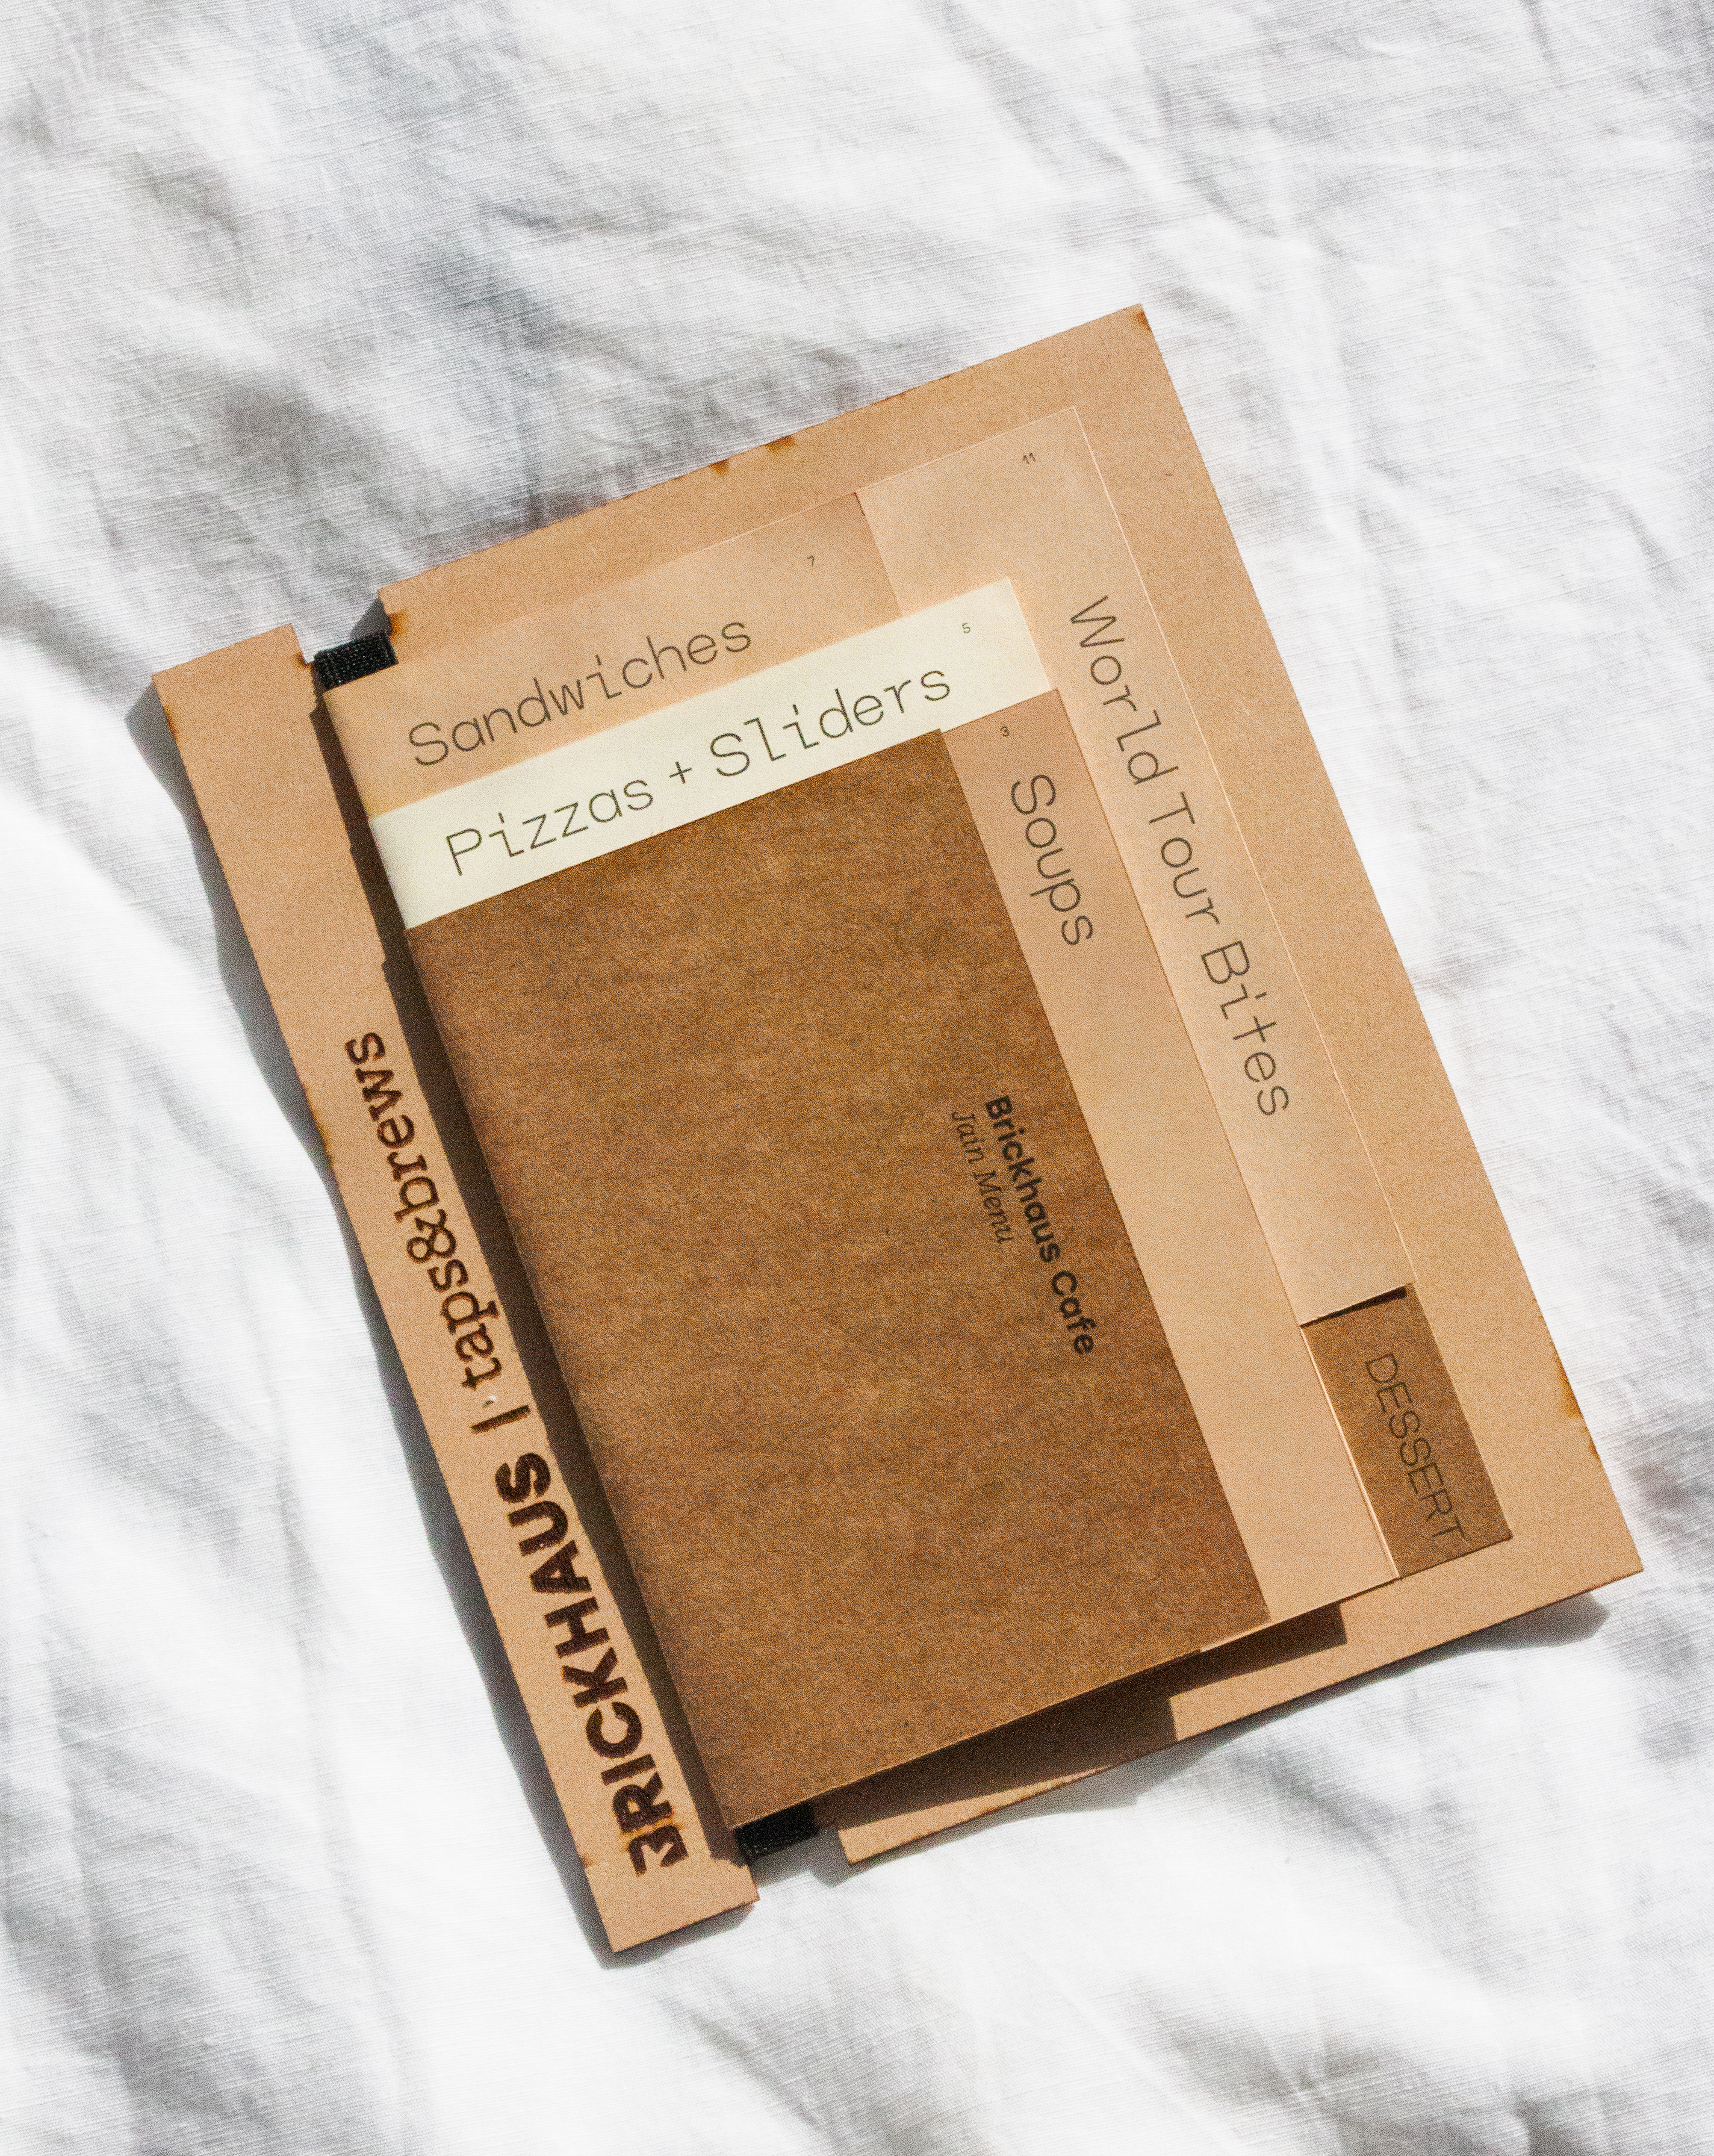
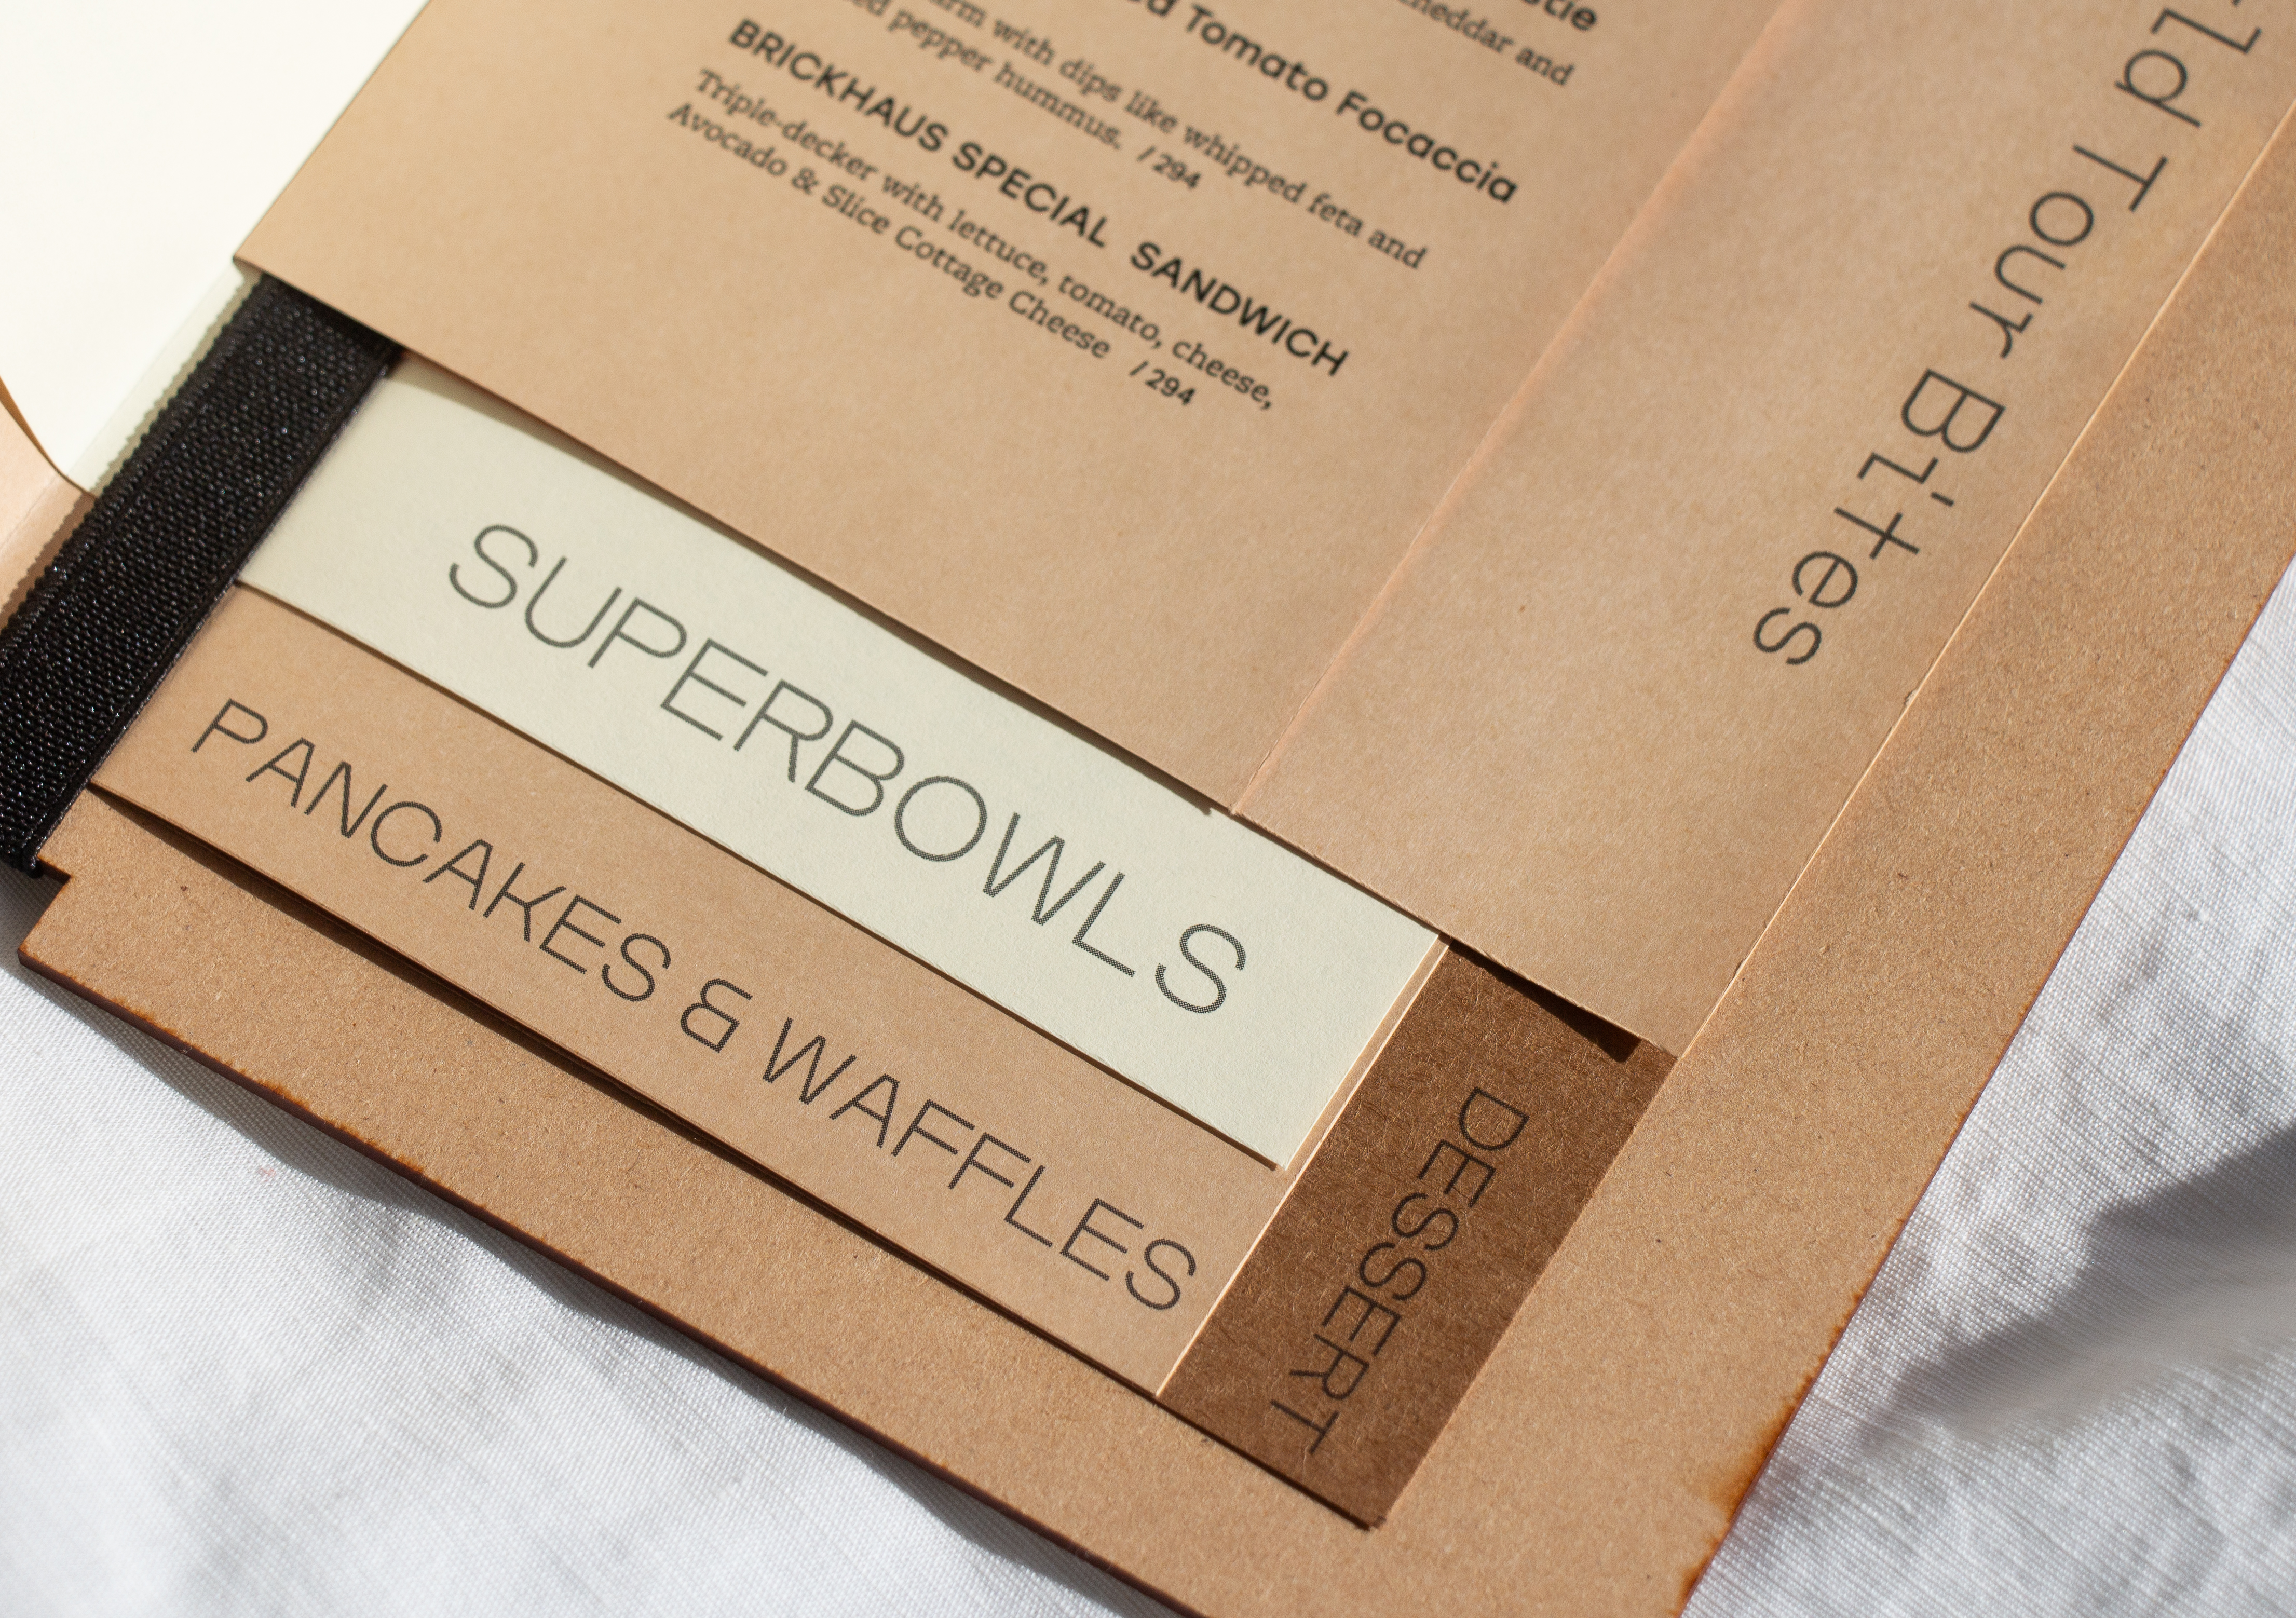

Explored what can be done with imposition, implemented vertical and horizontal offsets as interventions. Used the tool for an actual commercial project and delivered well produced menus!
In the early days was trying to play around with creating alternative book structures that would alter the content and produce alternate ways of navigating the content and have space for interactions between pages.
and: this other idea where spreads would be formed at page intersections (so only when pages from the two different booklets correctly aligned)


No summary, just a note to come back to this and make something nicer. I think the concepts are interesting, just have to craft these better.
I worked on a booklet project with Craig towards the end of the fall semester.
The project was generally really simple, but it put my publication stack to the test. How well could it handle typesetting about 8000 words. Turns out the finer details weren't great and the rags were all over the place, but other than that it was a pretty good outcome considering it was designed and fabricated in 4 days.


Played around with baseline shifts and conditional styling (see below).

Craig's annotational feedback. Since the tool didn't support PDF exports yet, "PDF" was sent as an mp4
For this project I also implemented a 2-up imposition [1] export.


Here is where the issues with raster exports began. Up until now I wasn't really paying attention how accurate the size would be when it was printed. I assumed as long as the ratios are correct, I could just print JPEG files and just fit them to the paper. For the most part this method worked, till it came the time to print this specific project. Because the spreads were imposed on the 11x17 with two spreads on each side -- to minimize the amount of cuts that are needed, the spreads had to be be correctly positioned when printed -- which they were not. They were off by about 1/2 an inch at its worst and about 1/16th of an inch at best.
This experience made me look into PDF exports. Which turned out to be easier than I thought. Instead of using p5.js, I could switch it out for pdfkit . I wrote a compatibility layer so it could be rendered on HTML canvas through p5.js but can be saved as a PDF.
With PDF also came some nice affordances, like being able to use spot color!

I think the outcome is not that great looking, but it technically worked and I was able to specify spot colors and the printshop was able to print it.
Tried some conditional typesetting, finer details like baseline shifts, indents and character styles. Implemented 2-UP imposition which exposed limitations of printing JPEGS, eventually made the move to working with PDFs
I offsetted the spine vertically and then horizontally, so at this point it felt the logical next thing would be to rotate the spine.
Surprisingly, around the same time, Alexandra from my thesis cohort had found her self experimenting with the same gesture in her own workshop experiments.

Alexandra's print experiment
So anyways, I had to figure out how to make this fold stuff work. And to do that I had to solve this simple problem:
Given a fold line on a sheet of paper, find how the paper would fold.
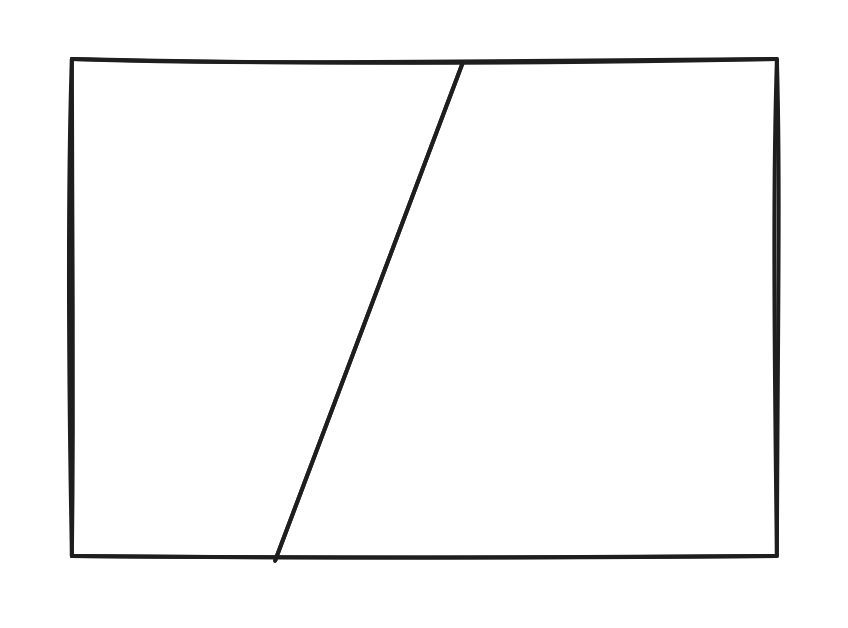
So calculate the vector coordinates for the two quads (separated by fold line) after one of them is reflected over the fold line.
It took me quite some time to figure this out because I was not very attentive during high school. I had to go back to high school math, and re-learn all the stuff I slept through. Revised on how to find perpendicular lines, what the slope/gradient of a line means. Then constructing triangles using perpendicular line, using triangles (soh cah toa) properties to calculate the reflected points, and so much more [2] .
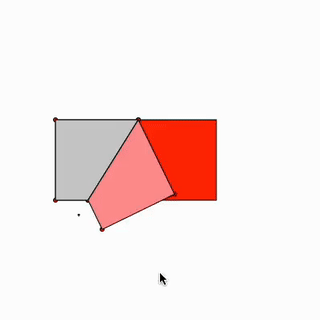
After bunch and bunch of failed attempts I got something like this working. Even after getting this working I had to tweak some stuff because it wouldn't work for all directions and what not.
Then once I had this working for a single fold, I was like cool, let me try for two folds!
And that worked by just incrementally reflecting all the points past a fold and iterating through them... Eventually made it so I can edit foldlines and have multiple lines.
And then finally, given a printed surface with say some image or graphic on it, how would the graphic look folded up given the fold lines. This one was more tough than I thought and it still breaks sometimes when the angle of rotation is more than 180 degrees, which I need to figure out how to fix. But still it looks so awesome and feels gratifying!
I find this video the coolest.
"Although its funny cause when I print it out and fabricate it... it just feels like... oh cool you printed on a long piece of paper and folded it up :) I shall figure out some use case for this now that I've implemented it :P " ~ December 2025
Eventually after I let this project marinate in my head for a while... I thought about how folds are more intuitive to do physically -- but by that logic I would have done this for nothing. But then I thought about it more, and came to the conclusion -- folds are more intuitive to do physically (yes) and also interesting to iterate computationally (oh). So I can think of the folding paper as an Interface [3] .

Strips of paper marked with units.

Folded into a letter form


Sheet unfolded to read the data and then entered into a program.
Once the points are entered into the program, it can generate the letterform.

And from here, this form can be iterated on by changing the parameters. For instance if we change the width of the sheet in the program while keeping the points the same, because with sheet is thinner, the angles of the foldlines change, causing the form to deviate.

incomplete specimen for the fold typeface.
Explored and implemented folding paper algorithms. Found that the better use case for the folding program was to take folds from physical form into a digital form for further parametric exploration rather than developing digitally and executing physically.
As an explanatory exercise of the process behind setting a paragraph I made a book that shows the process underneath (for a left-aligned paragraph).
This got compiled, imposed into signatures and printed and bound into a book. Going forward I think this is an an interesting presentation for step-wise program execution. I can see conditional typesetting logic being expressed aptly here.
Did a project that explicitly explains step-wise execution of typesetting program.
If you aren't interested in the programmatic aspects, feel free to skip to the Graphical Interface part
While investigating the typographical stack, I was simultaneously also having a tangential explortation -- interface.
For the most part of the project, I didn't have a graphical interface. Whatever I was making, I was hardcoding it into a Javascript files. Here are some excerpts from how the code is structured underneath, or this is how the programatic interface looked like.
To create the scale, we initalize the class with a DPI
let s = new Scale(150)

// and then use it to get px values
let fourInches = s.inch(4) // 4*150 = 600px
This is how the grid structure is defined:
export let grid = new Grid({
	page_width: s.inch(9.5),
	page_height: s.inch(6.5),

	margin: {
		top: s.em(2),
		bottom: s.em(2),
		inside: s.em(1),
		outside: s.em(2),
	},

	columns: 8,
	gutter: s.point(6),
	hanglines: [
		s.em(3),
		s.em(6),
		s.em(9),
		s.em(12),
	],
})
And then we can use the grid structure to position a text frame on a page, you could write it as a nested array:
let frame = ["TextFrame",
    ["text", "Text on column 2 on Verso"],
    ["font_family", fonts.ouma],
    ["height", ["em", 12]],
    ["y", ["hangline", 1]],
    ["x", ["verso",  2]],
]
Paragraph styles are defined like this
export let paragraphStyles = {
	"+:title": {
		font_weight: 500,
		font_family: "stolzl",
		font_size: s.point(17),
		leading: s.point(21)
	},
	"+:comment": {
		font_weight: 300,
		font_family: "freight-macro-pro",
		font_size: s.point(9),
		leading: s.point(10),
	}
}
And can be activated by using them in text like this:
let frame = ["TextFrame",
    ["text", "+:comment Text on column 2 on Verso"],
    ["y", ["hangline", 1]],
    ["x", ["verso",  2]],
]

Even though the grid positioning makes it much easier to put things on a page, I still needed some form of a graphical interface, not only because it would be more intuitive, but that it also gives me more opportunities to utilise interfaces in interesting ways [4] .
My first attempt at an interface for this tool was for a virtual book that I made. This was my Workshop Proposal for our Anti-thesis cohort .
As it is evident, all the interface does is makes the nested Array structure into an html interface. So it doesn't add much other than a shorter feedback loop for positioning items and such. Rather it is a downgrade because now I'm unable to use the affordances I have from programming with this (such as for loops, using variables, etc).
To overcome this I started adding keywords that would invoke functions. So the nested Array structure turned into a Lisp.
For instance,
TextFrame({
    text: "hello world",
    x: multiply(Math.random(), inch(4)),
    y: inch(2),
})
Could be written as
["TextFrame", "{}",
  ["text", "hello world"],
  ["x", ["mul", "rand", ["inch", 4]]],
  ["y", ["inch", 2]],
]
And then I iterated on this a bunch. At this point I wanted this to be a scratch or fructure type software.
Initially I was trying to restrict myself from involving the mouse in these interfaces and was wondering if I could find interesting patterns of working with form if I stuck to keyboard only editing. Although I came to the conclusion that this was a foolish idea [5] .
However I still wanted to keep the constraint of not having elements draggable on the canvas itself. I wanted to maintain the dataness of the elements on the screen. What I mean to say is, I want the elements to be a result of data rather than the elements being able to control the data (moving them mutates their x and y positions).

Initial sketch for how I could incorporate mouse controlled elements to this existing UI.
First implementation for this.
After implementing this, I realised that managing the layout with this kind of UI in a static sidebar is going to be a giant pain. It could work decently for small stuff like the above example, but if this composition got complex it would be a pain to navigate.
I kept going back to the UI's of Max MSP, Pure Data, Grasshoper or even Touch Designer. Eventually I decided to turn the whole structure into a node based canvas UI.

Initial sketch
First Draft of the UI
This is how it looks currently...
Text updates when you change it :)
As it may or may not be evident from the videos, data flows from one node to another, which takes the data it recieves and transforms it in its programmed way and sends it forward. Most imporantly, It can have any UI to reflect and edit its state. This is the primary PRO of this approach [6] .
Did some basic interfaces and slowly progressed to a node based interface. Currently struggling with making the node based interface intuitive and easy to navigate around.
The most common critique I've gotten in the last few weeks is that "Everything looks interesting (breadth) but nothing looks explored (depth)". Which points me to making more outcomes. I think I've been too caught up with the development part, and I would leave things behind the second they started working, as if to say "problem solved". I need to go back and tie up all these knots by utilising the systems that I have devised to make some cool stuff!
Also what I need to work on is the presentation. How can I communicate to someone who has never seen this project what this project is (?)
It seemed like I needed some anchors. What is this project about? It's an exploration of the typographical stack... What is the typographical stack?

I'm thinking of fitting the work I have done into these four categories. And more importantly making more work (more books, posters, videos, websites and such) that explain all of this stuff.
I kind of also think I have work that is made possible due to these categories, and there is work that evidently explains these categories. For instance, I think this menu project...
... is a good example for the imposition category and explains what the domain of imposition is, but also is enabled by paragraph and structure but doesn't explain them. So I think I need to find a mediation, or a way to put these projects into their boxes... or maybe I need to distinguish work that is just work in itself and work that explains the larger project.
Going forward I need to utilise these systems to show what kinds of forms they are capable of making as well as make things specifically to explain the project. I'm thinking of using the categories, "Letter", "Paragraph", "Structure" and "Imposition" to section out the work so that it can be digested a bit easier by an audience that is viewing the work for the first time.

where i started
published June 17th 2026
Artifacts I made using the tools to exhibit at the graduate open show in May. This is how the exhbit was set up. (Made the tabletop myself too :)

There was an iPad and two phones framed onto the table + an iMac which had documentation of the tools playing on loop, much of the same media that's flowing through this blog post.

One of the books I made using these tools is called Musings. Its a zine of writings by omama . The core mechanism and the visual language of the book comes from this environment where moving text boxes leaks the words from the text boxes leaving a trace of the action of desigining.
Grid structures are then produced based on the position of “leaked” words, creating an environment where grid structures are produced as a result of free form composition rather that being a precursor to composition.
Close up of grid structure made using quad trees based on the location of "leaked words"

With all the paper folding simulation math that I did, I made some components for the node tool.
And using this modelled all the letters in the tool (folded them physically and then inputted the values into the tool). Once I had all the letters I made a component that would put letters together and let you type words or sentences.
And made news prints out of it:


Whoops! will add stuff here soon, I promise!!!
[0]
I was having fun doing all this math cause it was just geometry which I think just works very well with Graphic Design. And also some basic arithmetics and algebra. back
[2]
It also made me realise how much fun it is to learn math through programming. Because it really has a tendency to show that the interesting aspects of math is not the numbers, but relationships between systems and how they influence each other. Dynamic systems, such as programming make it so you can explore these relationships by constructing these mathematical contexts. ITS APPLIED! back
[3]
I've been really obsessed with ideas of interface through this study. I think its the idea that data can be given an representation, and that representation can be meaningful. And also the fact that I'm a graphic designer and visuals form and structure is fun to me. back
[4]
Interface has been a tangential exploration and a project in itself. However I'm not sure if I would or should present it alongside this project as another part of it, or just have it as something else entirely. back
[5]
why was it a foolish idea? back
[6]
I haven't figured out how to articulate this, but In a way its akin to being able to write pure functions. I mean to be fair they are pure functions with some state and UI attached. back